Using Github Pages with Google Domains and Cloudflare
Getting Started
In this tutorial, I’ll be going over how to connect your Github Pages website to Google Domains and Cloudflare. Before getting started with this tutorial, make sure you have already done the following:
- Set up a Github Pages website
- Own a domain name from Google Domains
- Have a Cloudflare account
Why Github Pages, Google Domains, and Cloudflare?
Github Pages allows you to build and deploy your site from Github! It’s free, very easy to use, and allows you to make quick changes to your website by simply changing the code in your repository. It’s great and I recommend it to anyone who wants a simple static website running.
Google domains was chosen simply because I find it easy to work with. You could easily use other services like GoDaddy or NameCheap as long as they let you change DNS settings.
Cloudflare provides content delivery network services, allowing your website to run faster and more secure. They offer a lot of different services like HTTPS, caching, analytics, viewing traffic, and more. I personally use it for my own website and find it nice to work with.
Configuring your systems
Github Pages Configuration
To configure Github Pages, add a file called CNAME to the root directory of your Github repository. Inside this file, you’ll put your domain name (e.g. www.randydeng.com). This tells Github where your domain is located.
Cloudflare Configuration
Upon setting up your Cloudflare account, you will be prompted to add your website. Add your website and enter your domain name (e.g. www.randydeng.com). On the next page, Cloudflare may take care of setting up some DNS records if you already had DNS records on Google Domains. If not, complete the setup and ensure the following are included in DNS Records:
- Four A DNS records (see Github domain IPs for the exact IP addresses you need to add)
- One CNAME record that routes your
example.github.iowebsite to yourwwwdomain name
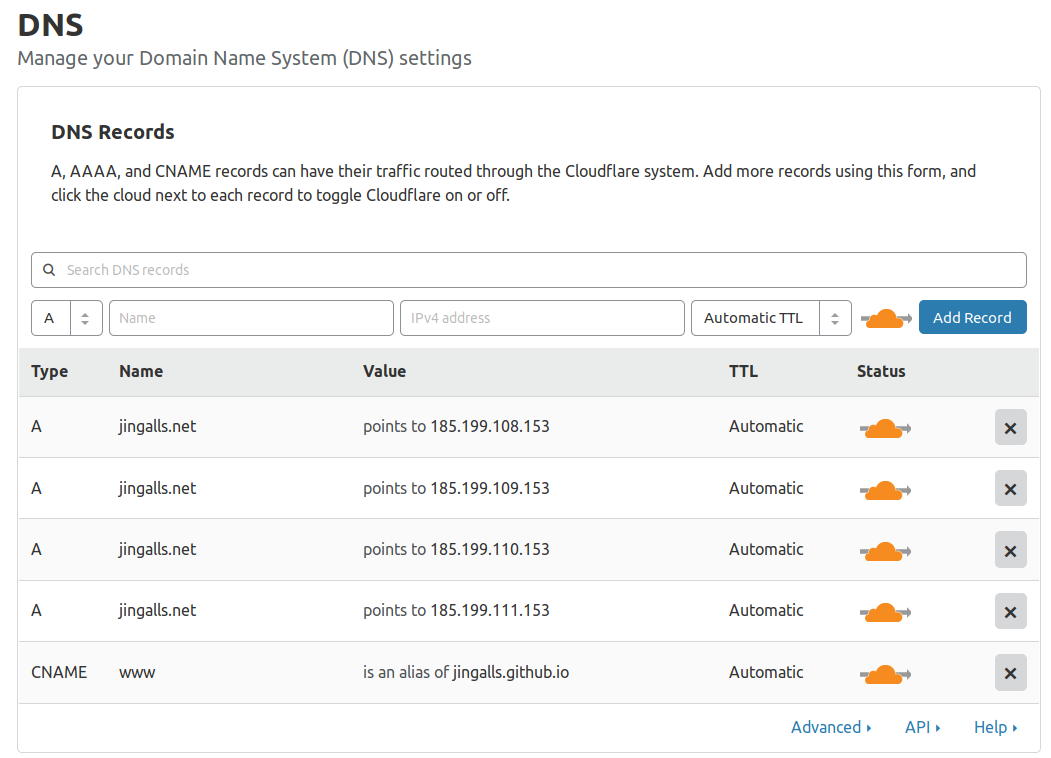
Cloudflare DNS settings that you should have. Replace your own website domain name with the one shown in the image.
During setup, you will also be shown two nameservers.
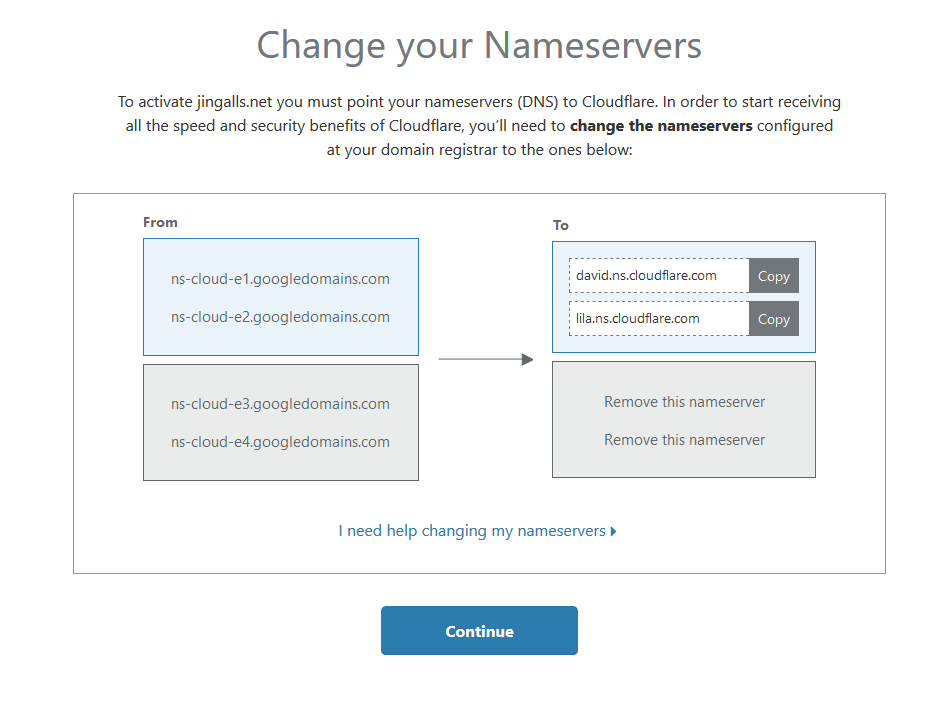
Cloudflare page that tells you your two nameservers. Keep in mind that your nameservers may differ from my own.
Jot down these two values somewhere, since you will need them to configure Google Domains. These nameservers tell users that your website IP address can be found on Cloudflare’s servers. Upon clicking continue, you will be brought to your websites settings page. The Overview page will also have your nameservers if you haven’t set up Cloudflare yet.
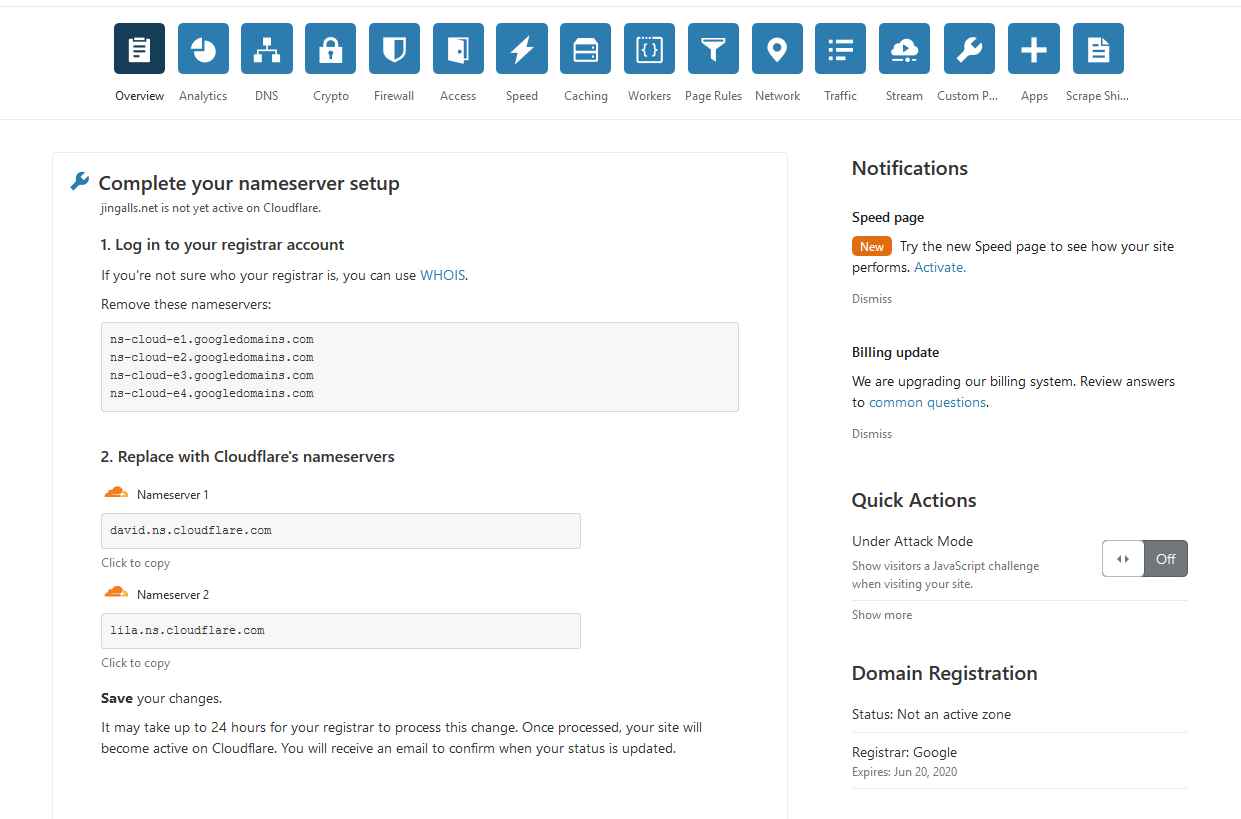
Your website Overview page on Cloudflare.
Google Domains Configuration
On Google Domains, click on the DNS tab. You will need to tell Google Domains that you want to send your traffic to Cloudflare instead of using the default Google DNS servers. To do this, click on Use custom name servers in the Name servers section and add the nameservers that you jotted down before. You should end up with something similar to the following:
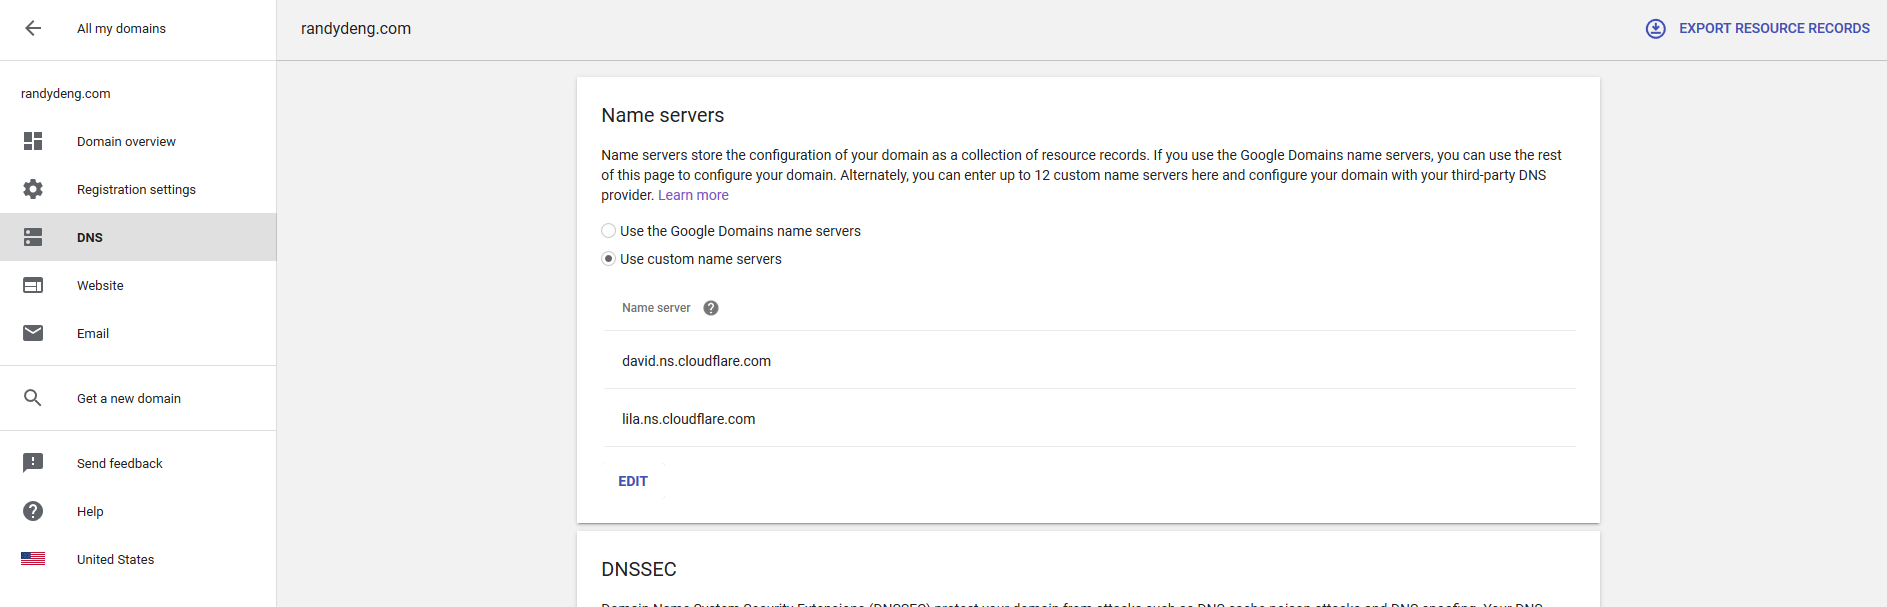
What your Google domains page should look like afterwards. Keep in mind that your nameservers may not be the same as mine.
Finishing Touches
If you visit your website, it should be up and running now! It may take a few minutes for all the changes to propogate through, but if everything is configured correctly, Cloudflare should now be serving your website. Let’s add some finishing touches.
Setting up HTTPS and subdomain forwarding
HTTPS is recommended since it helps with Google page rankings and it also means your website is more secure in general. The good news is that HTTPS is already set up for you! You can see your security settings in Cloudflare under the Crypto tab.
Subdomain forwarding is forwarding a particular subdomain (e.g. subdomain.randydeng.com) to your main website. In this case, I’ll be showing you how to forward your naked domain name (e.g. randydeng.com) to your main website.
Setup forwarding by going to your Google Domains configuration and into your DNS settings. In the Synthetic records section, add @ as the Subdomain and your https website link as the Destination URL. Select Permanent redirect (301), Do not forward path, and Disable SSL as your settings. If you’re skeptical about disabling SSL, this is only applied when redirecting http requests to https. Once the https connection is established, Cloudflare will ensure security from thereon.
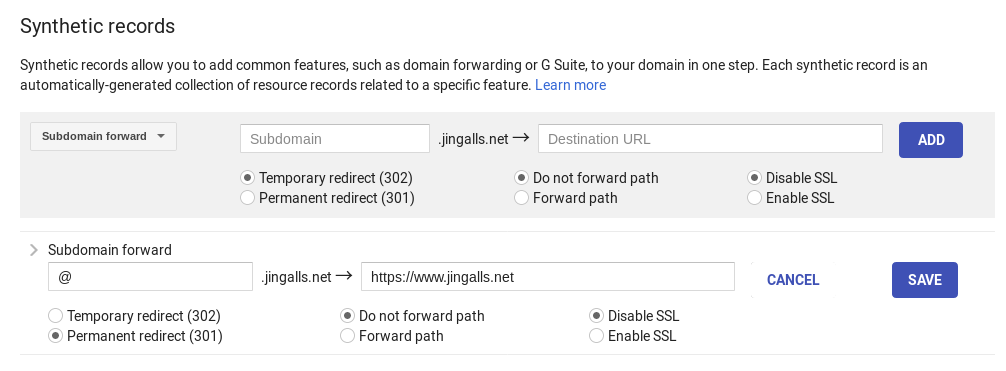
What your Synthetic records section should look like afterwards. As usual, make sure to replace the domain name with your own.
Setting up email forwarding
Since you have your own domain name, chances are that you want to set up email forwarding! Using a custom email can be professional and allows you a lot of flexibility. Since we’re using Cloudflare, that means that we need to tell Cloudflare where to retrieve email from.
The first step is to set it up in Google Domains. In your settings, go to the Email tab and add some information under Email forwarding. You will include the email address you want people to email you at, and the actual email address you will receive the email. I personally use [email protected], which forwards to a personal gmail account.
The next step is to go to your Cloudflare DNS settings. Here, you want to add MX records that tell Cloudflare to get email from Google’s servers. As of writing, you need to add the following to your DNS Records.
| Name/Host/Alias | Time-to-live (TTL) | Record type | Priority | Value/Answer/Destination |
|---|---|---|---|---|
| Blank or @ | 1h | MX | 5 | GMR-SMTP-IN.L.GOOGLE.COM. |
| Blank or @ | 1h | MX | 10 | ALT1.GMR-SMTP-IN.L.GOOGLE.COM. |
| Blank or @ | 1h | MX | 20 | ALT2.GMR-SMTP-IN.L.GOOGLE.COM. |
| Blank or @ | 1h | MX | 30 | ALT3.GMR-SMTP-IN.L.GOOGLE.COM. |
| Blank or @ | 1h | MX | 40 | ALT4.GMR-SMTP-IN.L.GOOGLE.COM. |
The exact up to date records you need to add can be found on Google Domain’s help page. Once you finish adding everything, send yourself an email to verify it’s working properly!
Hoorah!
Hoorah! You should now have a well-functioning website with HTTPS and email forwarding. Happy building!
Subscribe via RSS
Subscribe via Mailchimp